> ## Documentation Index
> Fetch the complete documentation index at: https://docs.shareofmodel.ai/llms.txt
> Use this file to discover all available pages before exploring further.
# User Roles & Workspaces
> Manage members, roles and workspaces from the Share Of Model settings as an organisation owner.
The User Roles and Workspaces management feature lets organisation owners govern access for team members across an organisation and its workspaces.
From the platform, organisation owners can:
* assign roles at the **organisation level** (for cross-workspace access),
* set granular permissions at the **workspace level**,
* create workspaces and allocate **credits** per workspace.
## Key terms
| Term | Definition |
| ----------------- | -------------------------------------------------------------------- |
| **Organization** | The higher-level account for a company or holding. |
| **Workspace** | Sub-level environment within an organisation (e.g. brands or teams). |
| **Role** | Defines a user's permissions (Viewer, Editor, Owner). |
| **Admin / Owner** | Primary user able to manage roles, workspaces and members. |
## User roles
### Organisation-level roles
Apply across all workspaces in the organisation.
| Role | Permissions |
| ----------------------- | ----------------------------------------------------------- |
| **Organization Guest** | No special org permissions — set permissions per workspace. |
| **Organization Viewer** | View all workspaces and analyses. |
| **Organization Editor** | View and create analyses across all workspaces. |
| **Organization Owner** | Administer the organisation and its workspaces. |
### Workspace-level roles
Apply to a single workspace.
| Role | Permissions |
| -------------------- | ---------------------------------------------- |
| **Workspace Viewer** | View analyses within the workspace. |
| **Workspace Editor** | Create and view analyses within the workspace. |
## Step-by-step
Log in, click your initials in the top-right corner, then click **Settings** to manage users and roles.
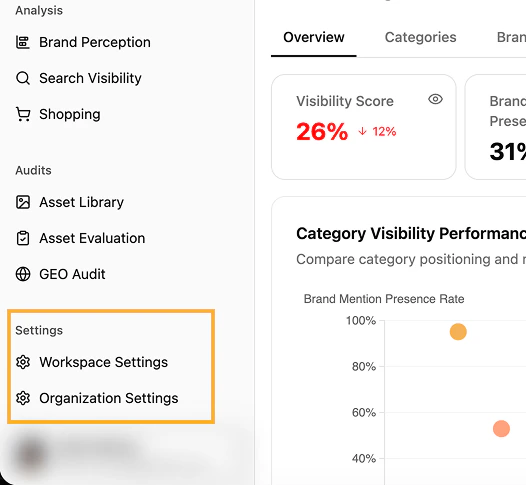 Settings exposes two main sections: **Workspaces** and **Members**.
From **Members**, click **+ Invite**, enter the user's email, and pick an organisation role (Guest, Viewer, Editor, Owner).
Settings exposes two main sections: **Workspaces** and **Members**.
From **Members**, click **+ Invite**, enter the user's email, and pick an organisation role (Guest, Viewer, Editor, Owner).
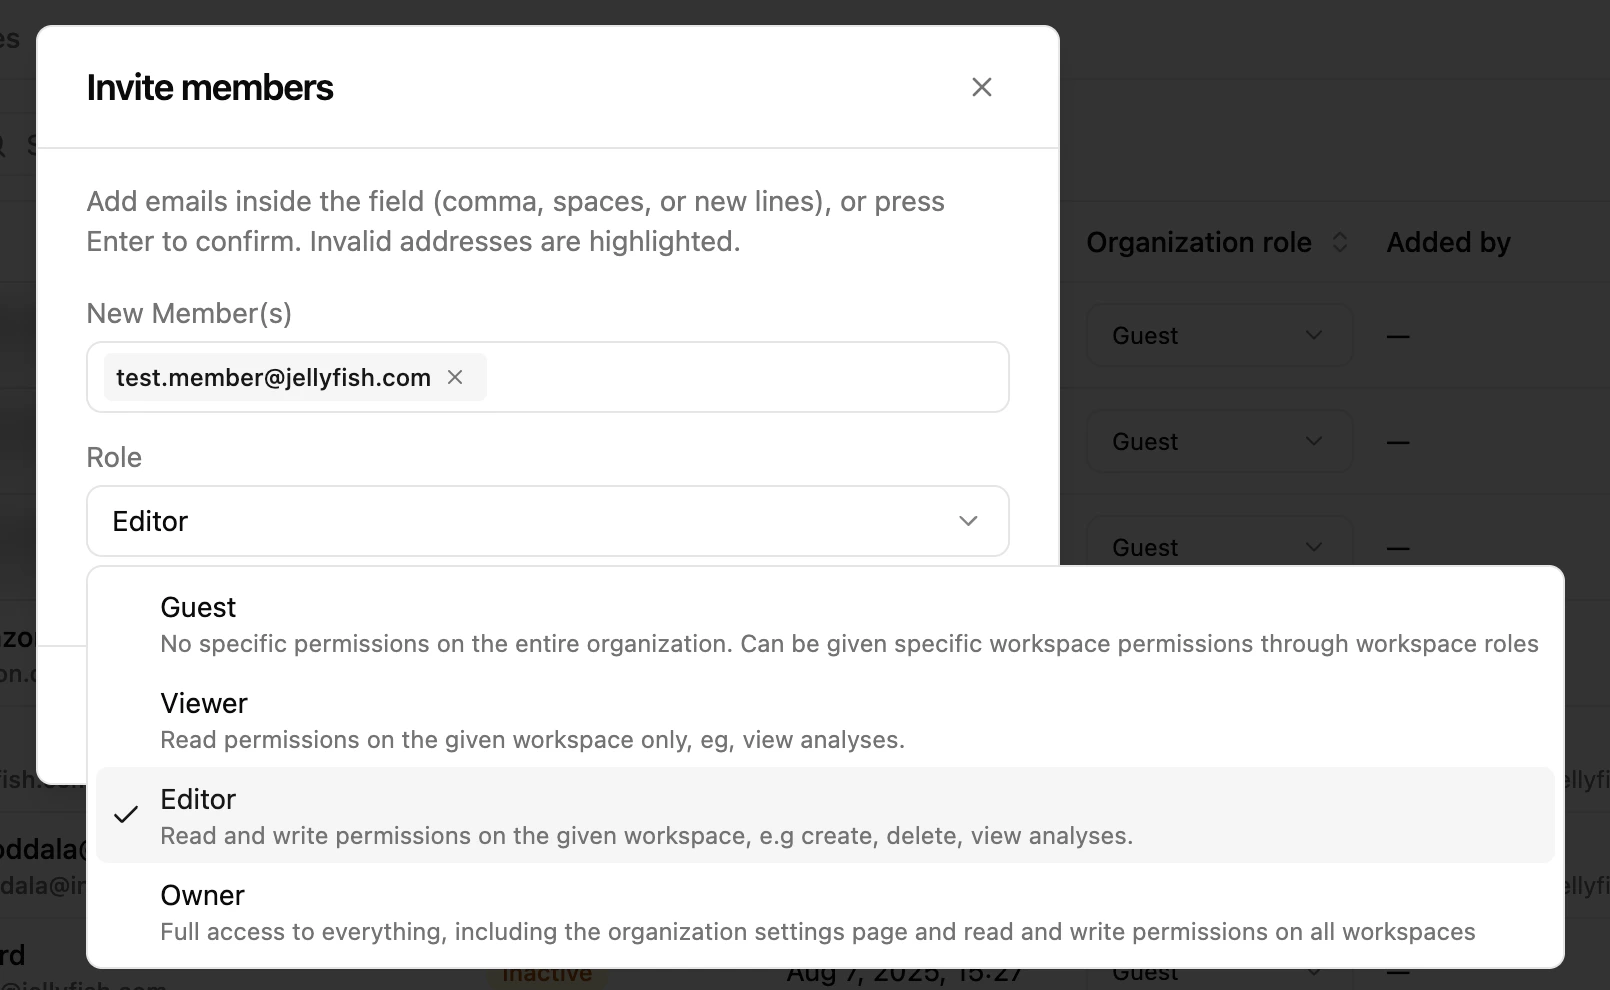 New emails receive a welcome email. Existing **Guest** users are granted access without an email notification.
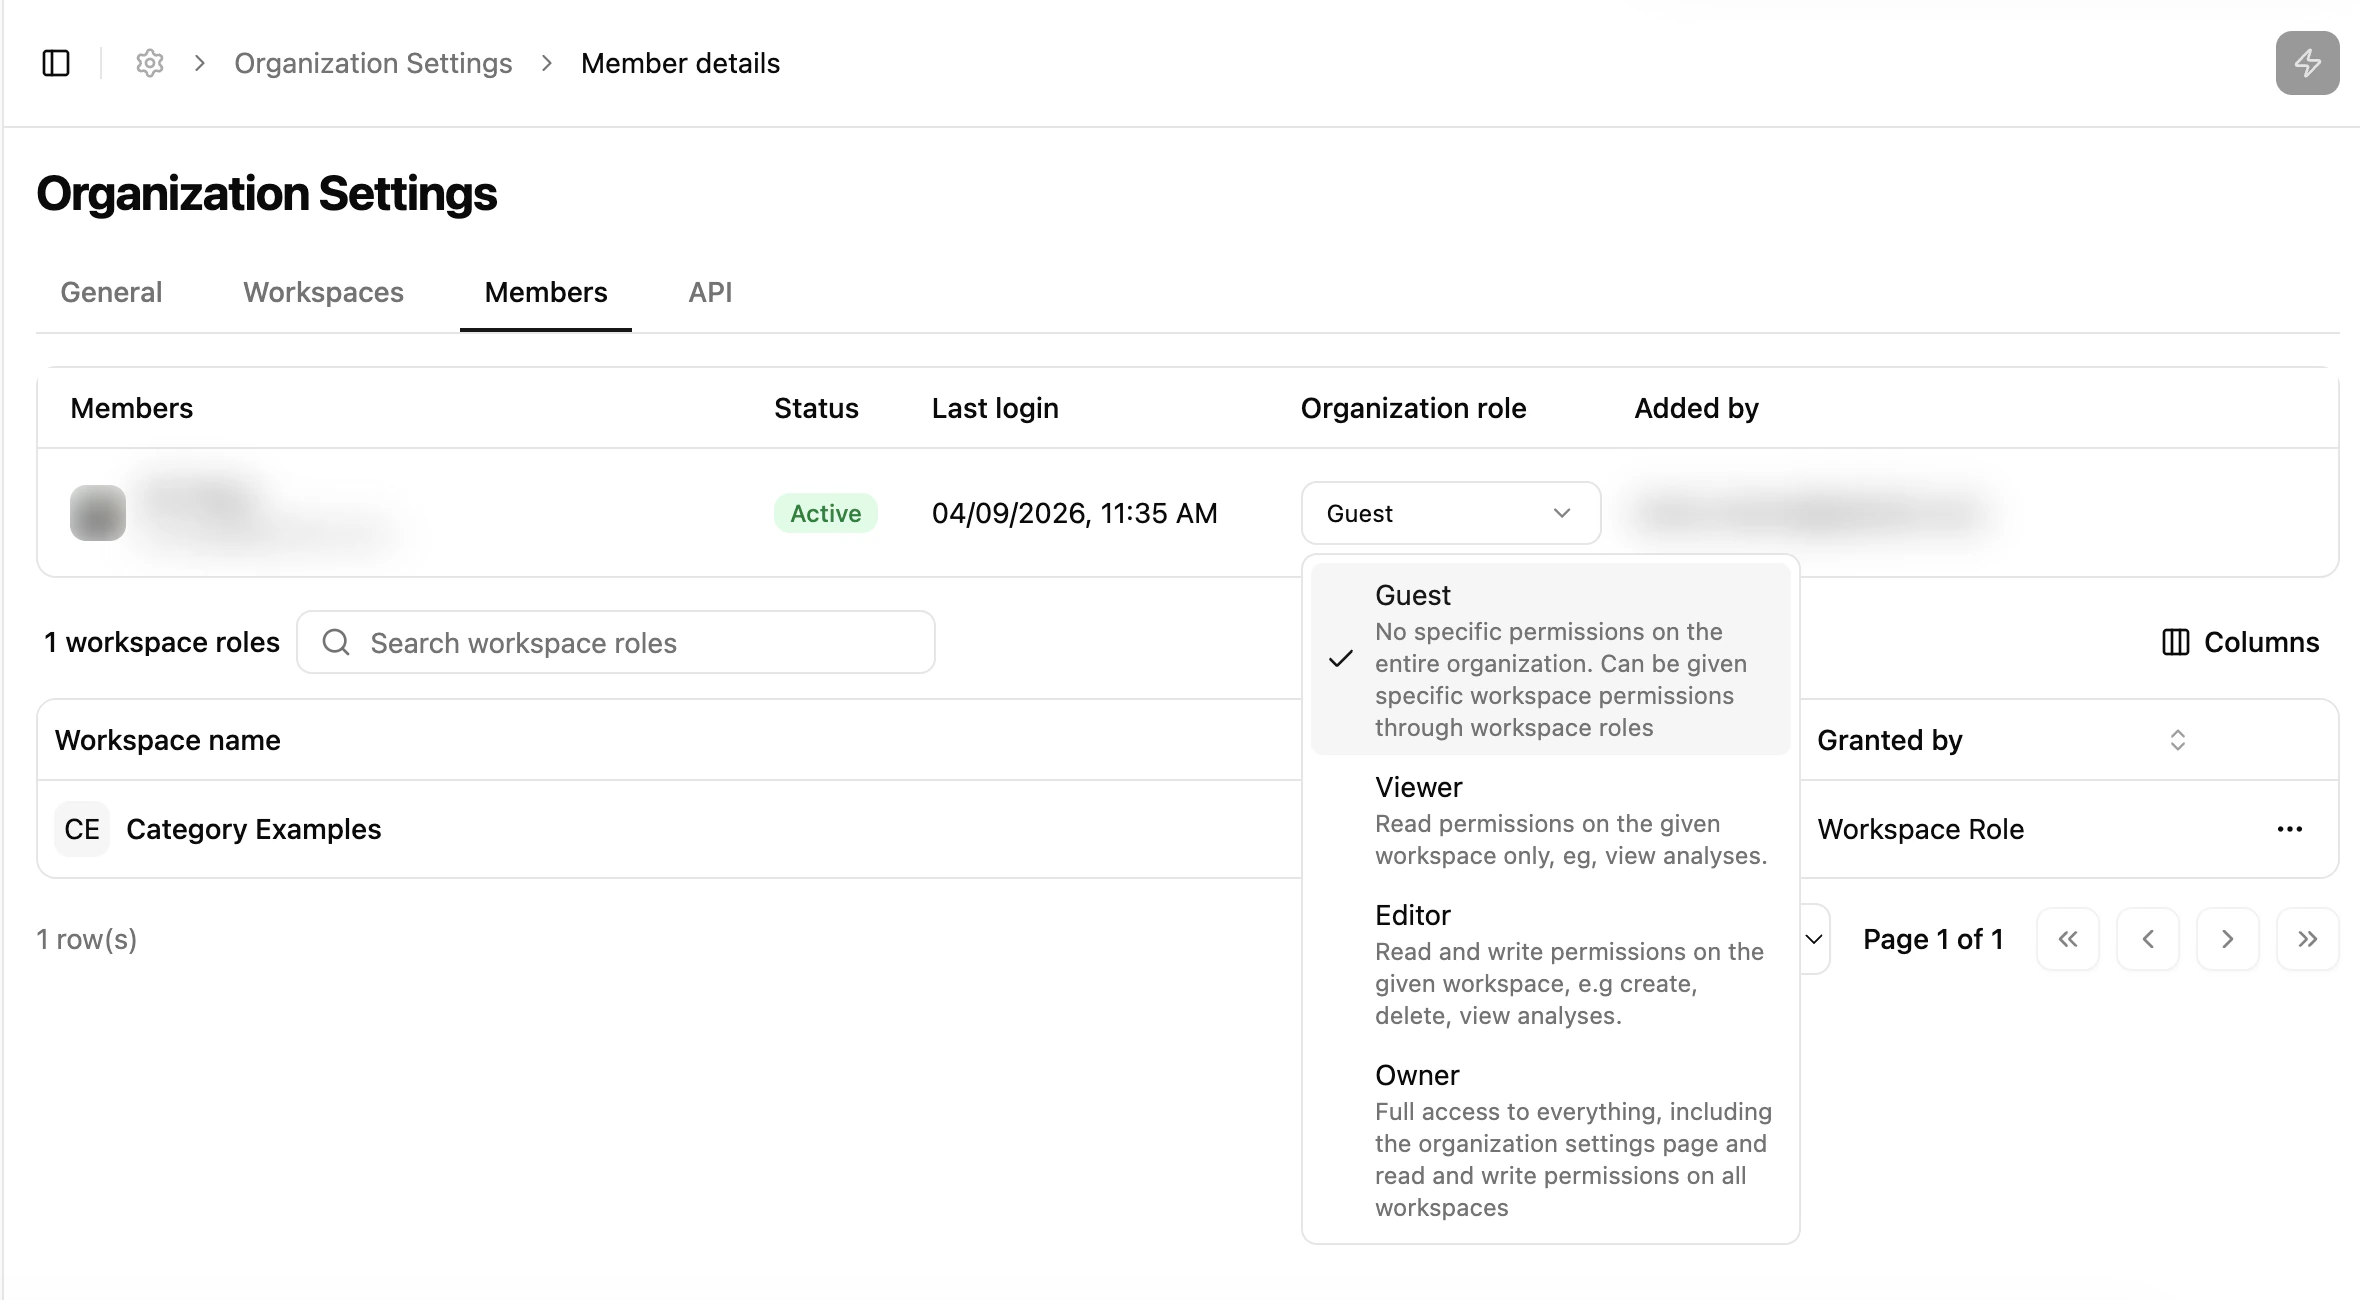
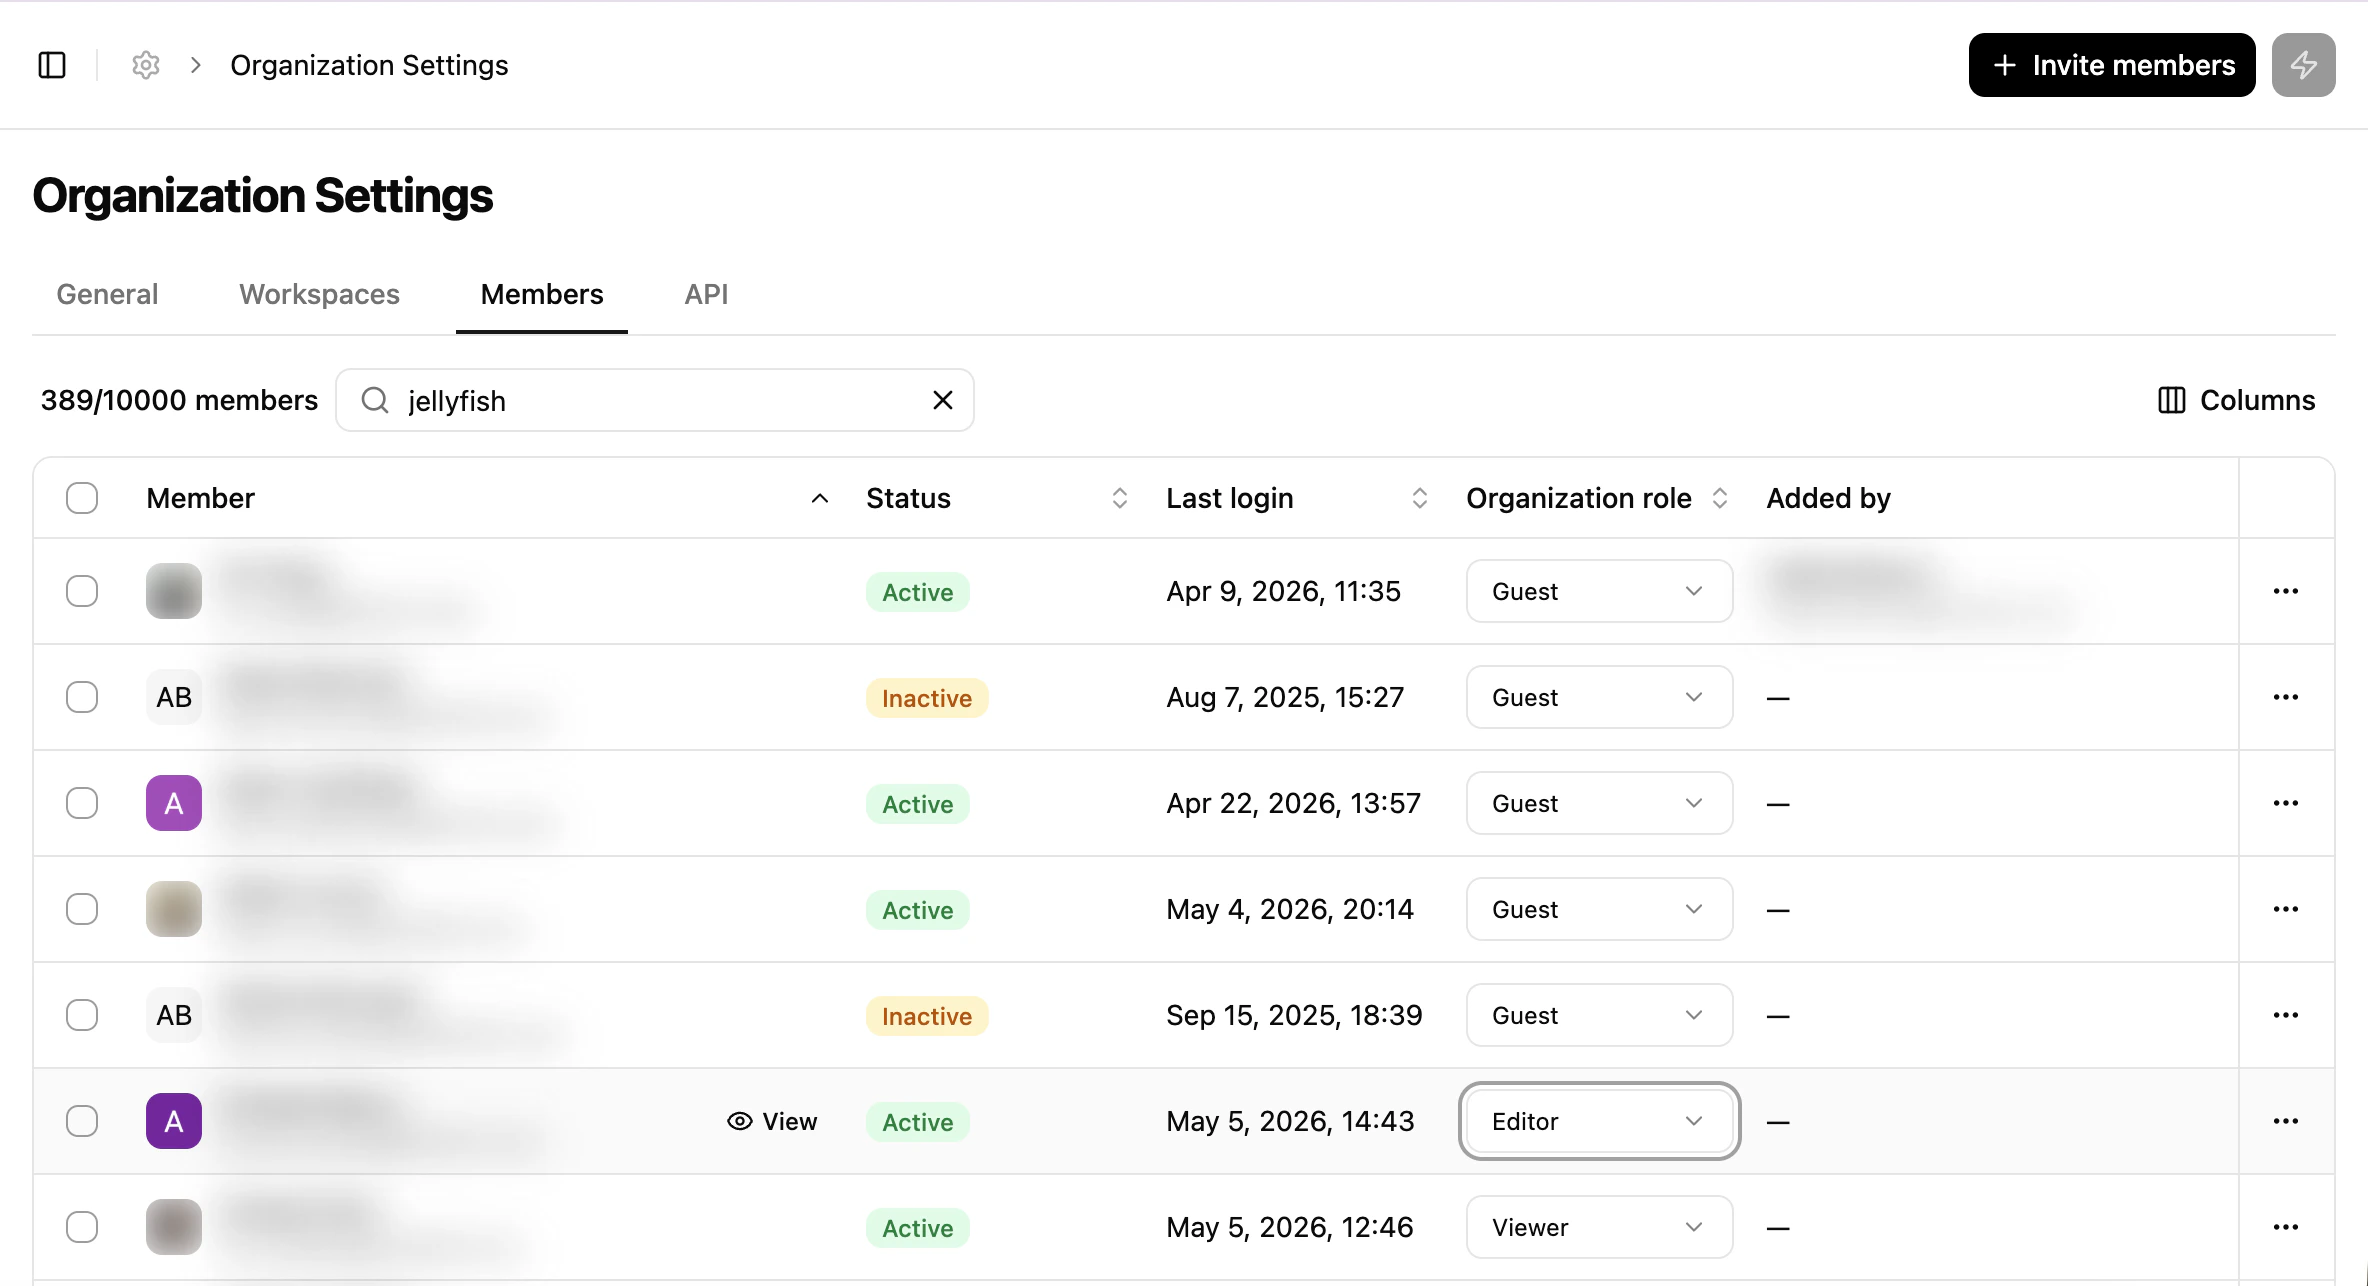
From **Members**, view all users with their organisation role. Select a user to update their role (e.g. Editor → Viewer) or remove them.
New emails receive a welcome email. Existing **Guest** users are granted access without an email notification.
From **Members**, view all users with their organisation role. Select a user to update their role (e.g. Editor → Viewer) or remove them.
 Open the **Workspaces** list.
New workspace creation is only available on the **Enterprise** plan. The Pro plan ships with a single workspace.
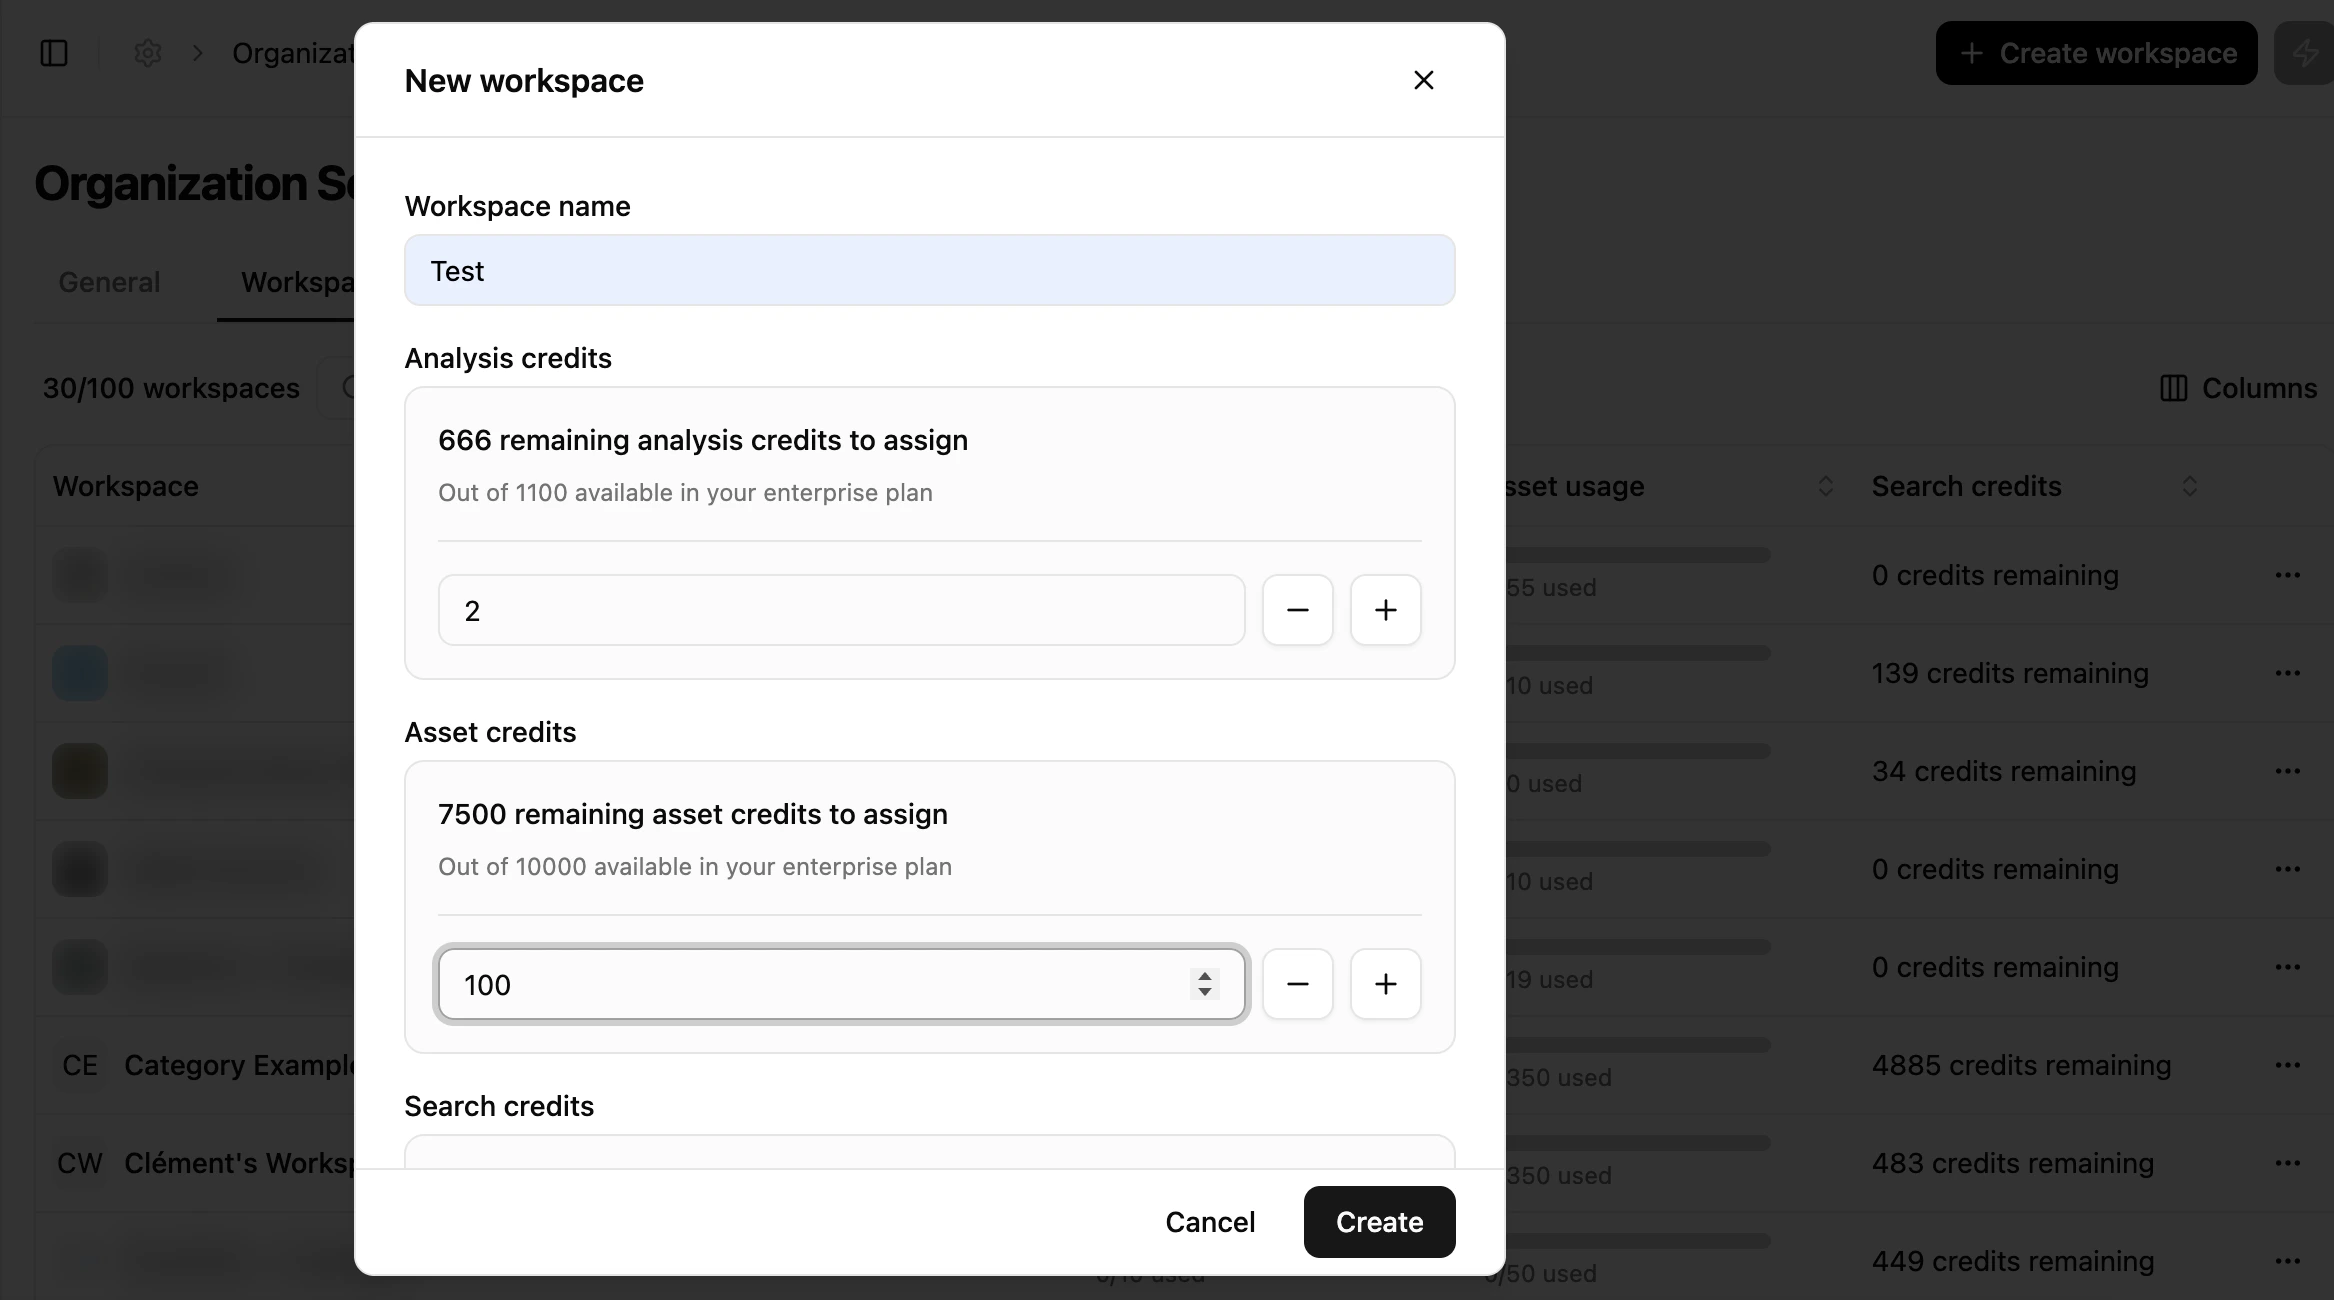
Assign a workspace name and a credit limit. Credits allocated at the organisation level can be distributed across workspaces as you see fit.
Open the **Workspaces** list.
New workspace creation is only available on the **Enterprise** plan. The Pro plan ships with a single workspace.
Assign a workspace name and a credit limit. Credits allocated at the organisation level can be distributed across workspaces as you see fit.
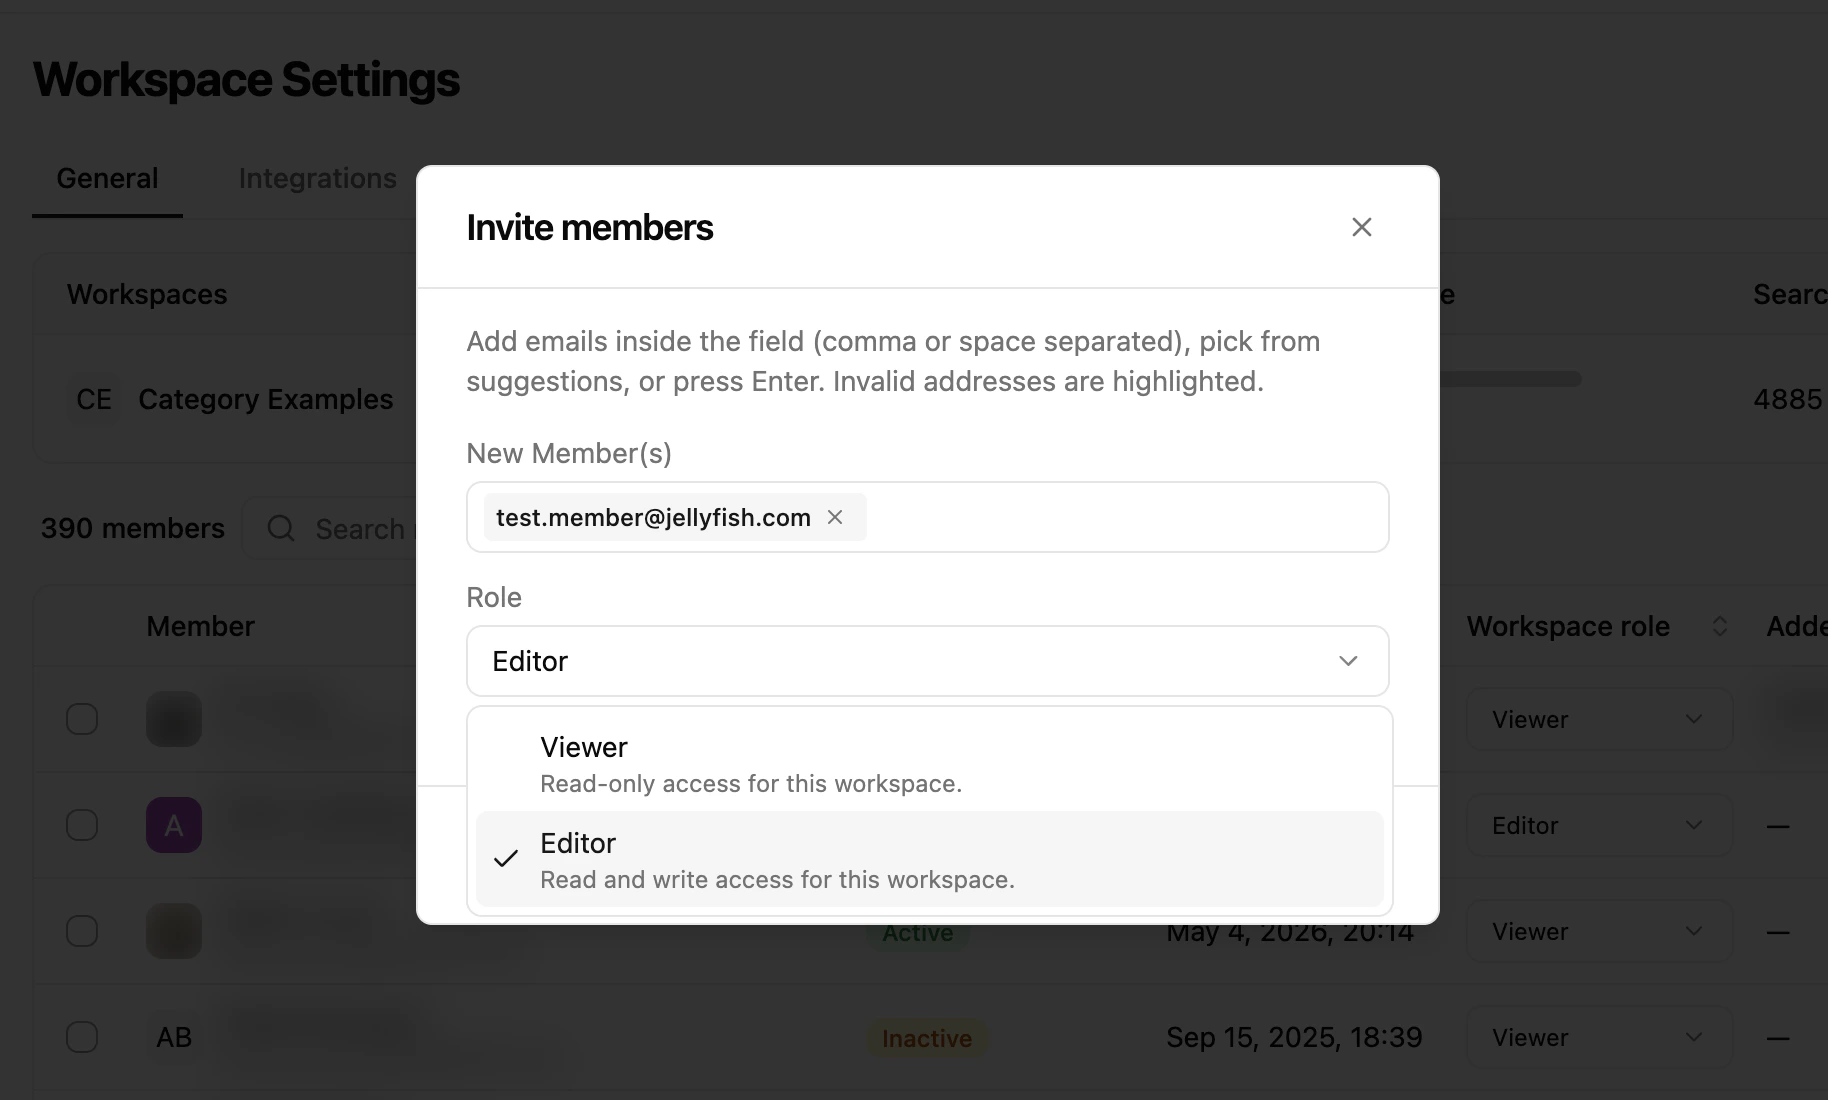
 Click **Invite Member**, enter the email, then assign a workspace role (Viewer or Editor).
 Update permissions for users with an organisation role of **Guest** within the workspace.
 ## What's next
Issue and manage API keys for integrations.
Understand how usage is metered.
## What's next
Issue and manage API keys for integrations.
Understand how usage is metered.